I’ve mentioned Steve Perry, the man behind the website Backcountry Gallery, before. He has some great tips and suggestions on how to improve your wildlife/bird photography (and has several tutorials and ebooks on using Nikon cameras). I would highly recommend going to his site and subscribing to get notified about his latest latest photography tips and videos.
Yesterday I spent a couple of hours with one of his latest how-to videos Lightroom Denoise Secrets: Make ISO 12,800 Look Like ISO 400 (the link takes you to his YouTube video). In the video he explains how to balance Lightroom’s Sharpening and Denoise functions in the Develop module. Steve dives into some of the functions of Lightroom that I haven’t used before, such as using a Sharpening Mask and creating a mask for the background. These techniques are not that hard to master and once explained (I took notes) I was able to apply them to some images on my computer. I think they made a big difference. I won’t repeat his steps here – you should see them in action in the video – but I will show you the before/after results of using his techniques.
Both exemplars are of shots I took of Inca Terns while on a birding trip in Chile and Argentina (more on that later). These great-looking birds were perched on the rock walls and flying around the hotel we were staying at in the town of Viña Del Mar. Karen went out on the deck overlooking the Pacific one morning and saw these birds while I was having breakfast and insisted I grab my camera and get some pictures of them. It was a very overcast morning with a gray, dimly lit sky. When I got home and loaded the pictures of the Inca Terns (along with the other 4,493 shots) into Lightroom I was disappointed that they didn’t show more detail. I decided to apply Steve Perry’s sharpening/denoise techniques to them. Did I like the outcome? See for yourself.
In the first Inca Tern shot, it is perched on the hotel deck’s wall. The first image was cropped – no other adjustments have been made. You’ll see that the entire image has a lot of noise, which partially obliterates some of the detail in the bird.
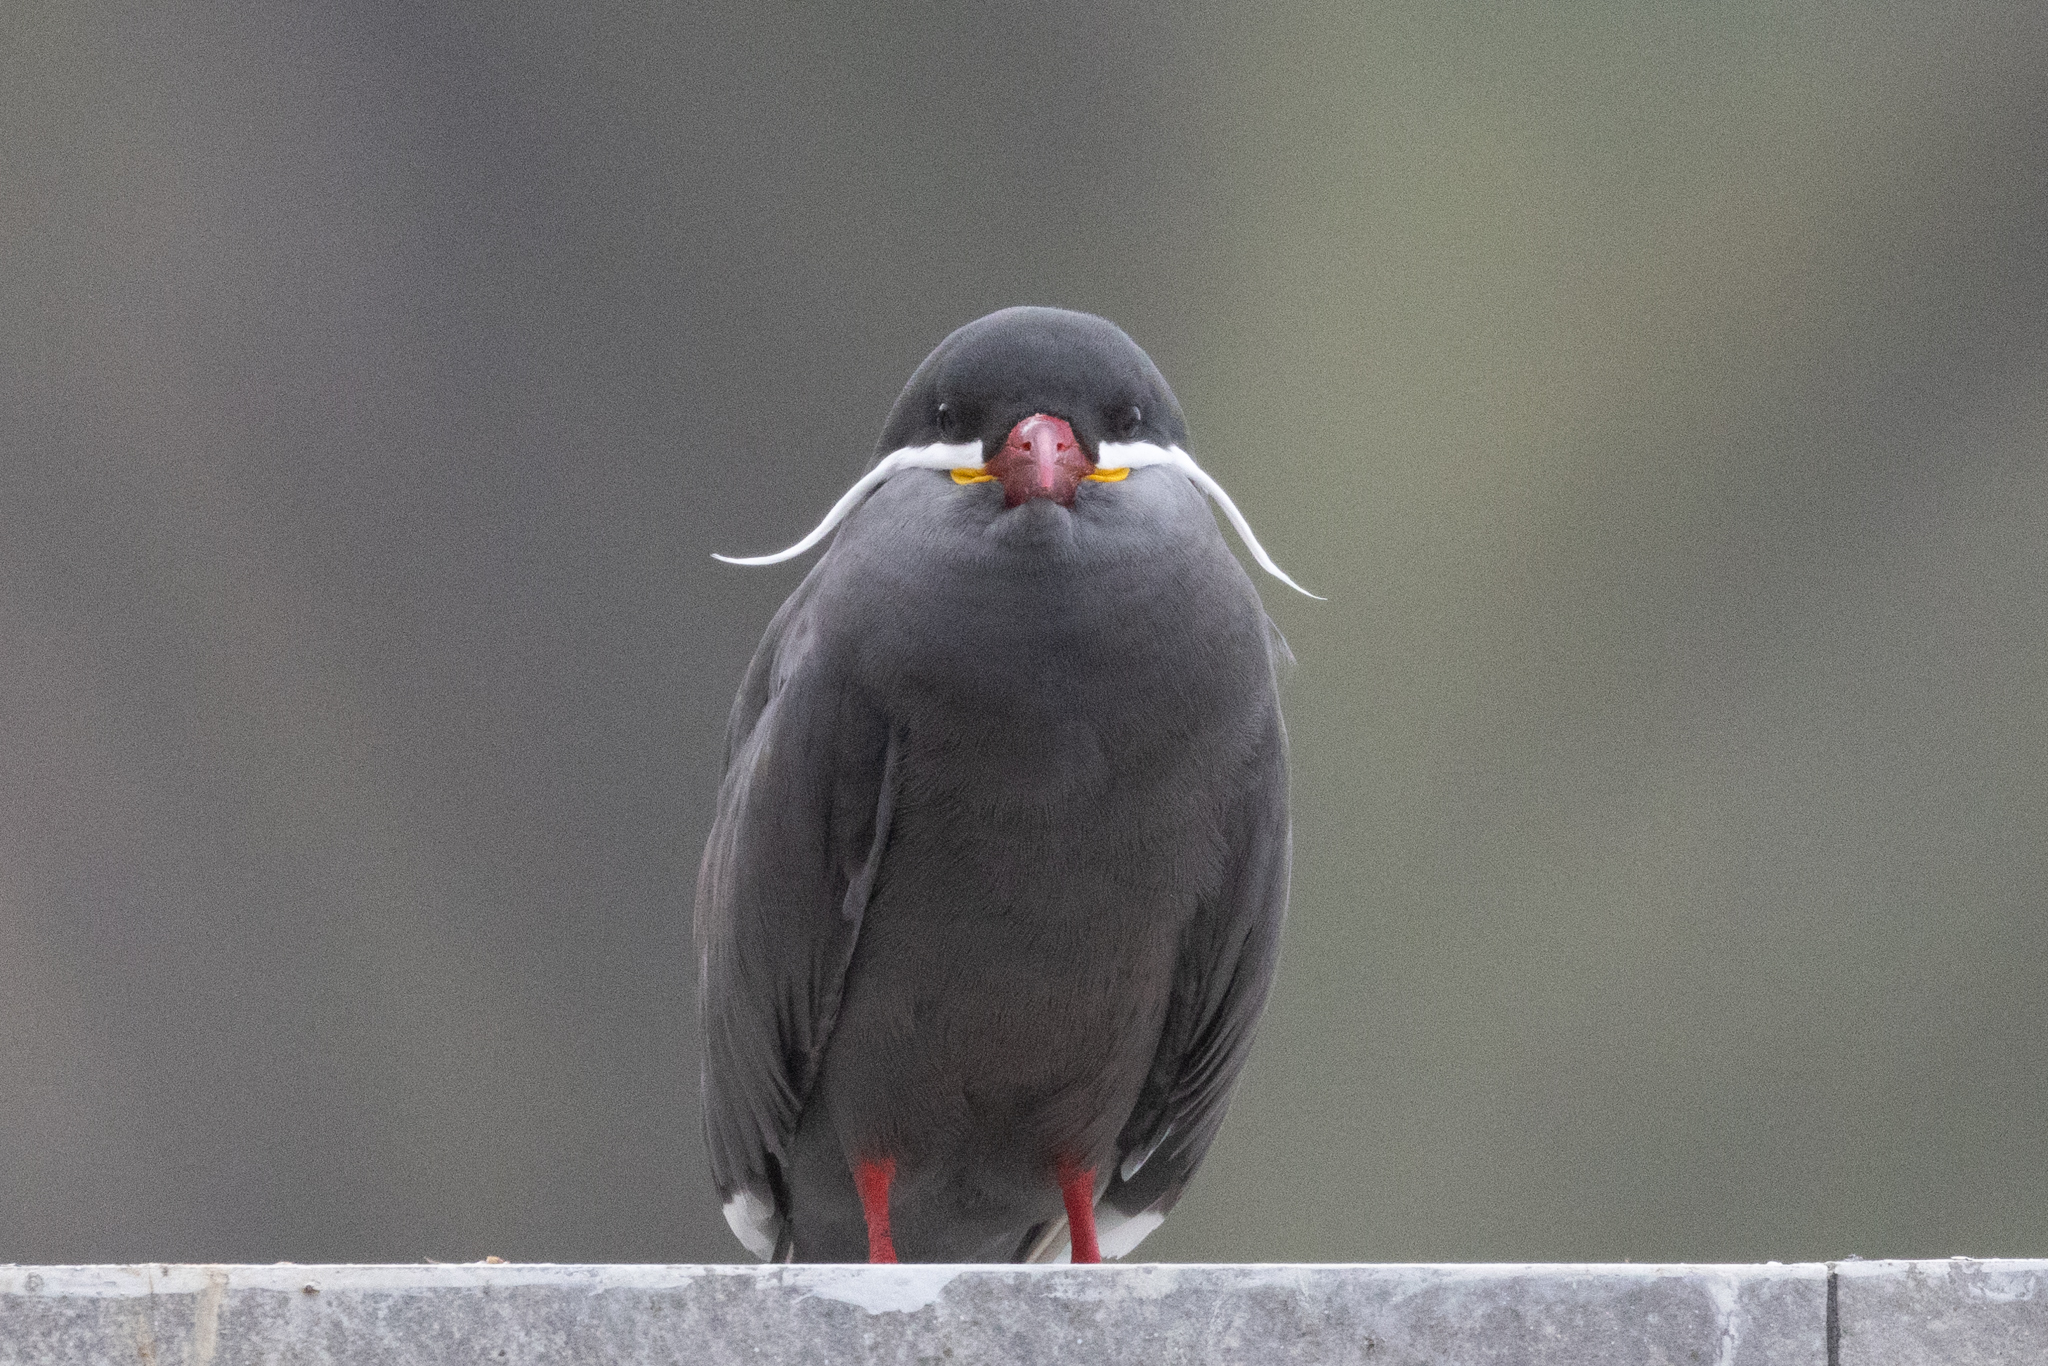
Below is the same image after I applied the sharpening/denoise techniques Steve Perry described in his video. Now you can see that there is very little noise in the background (or bird for that matter) and you can now see a lot more detail in the bird itself. Nice!

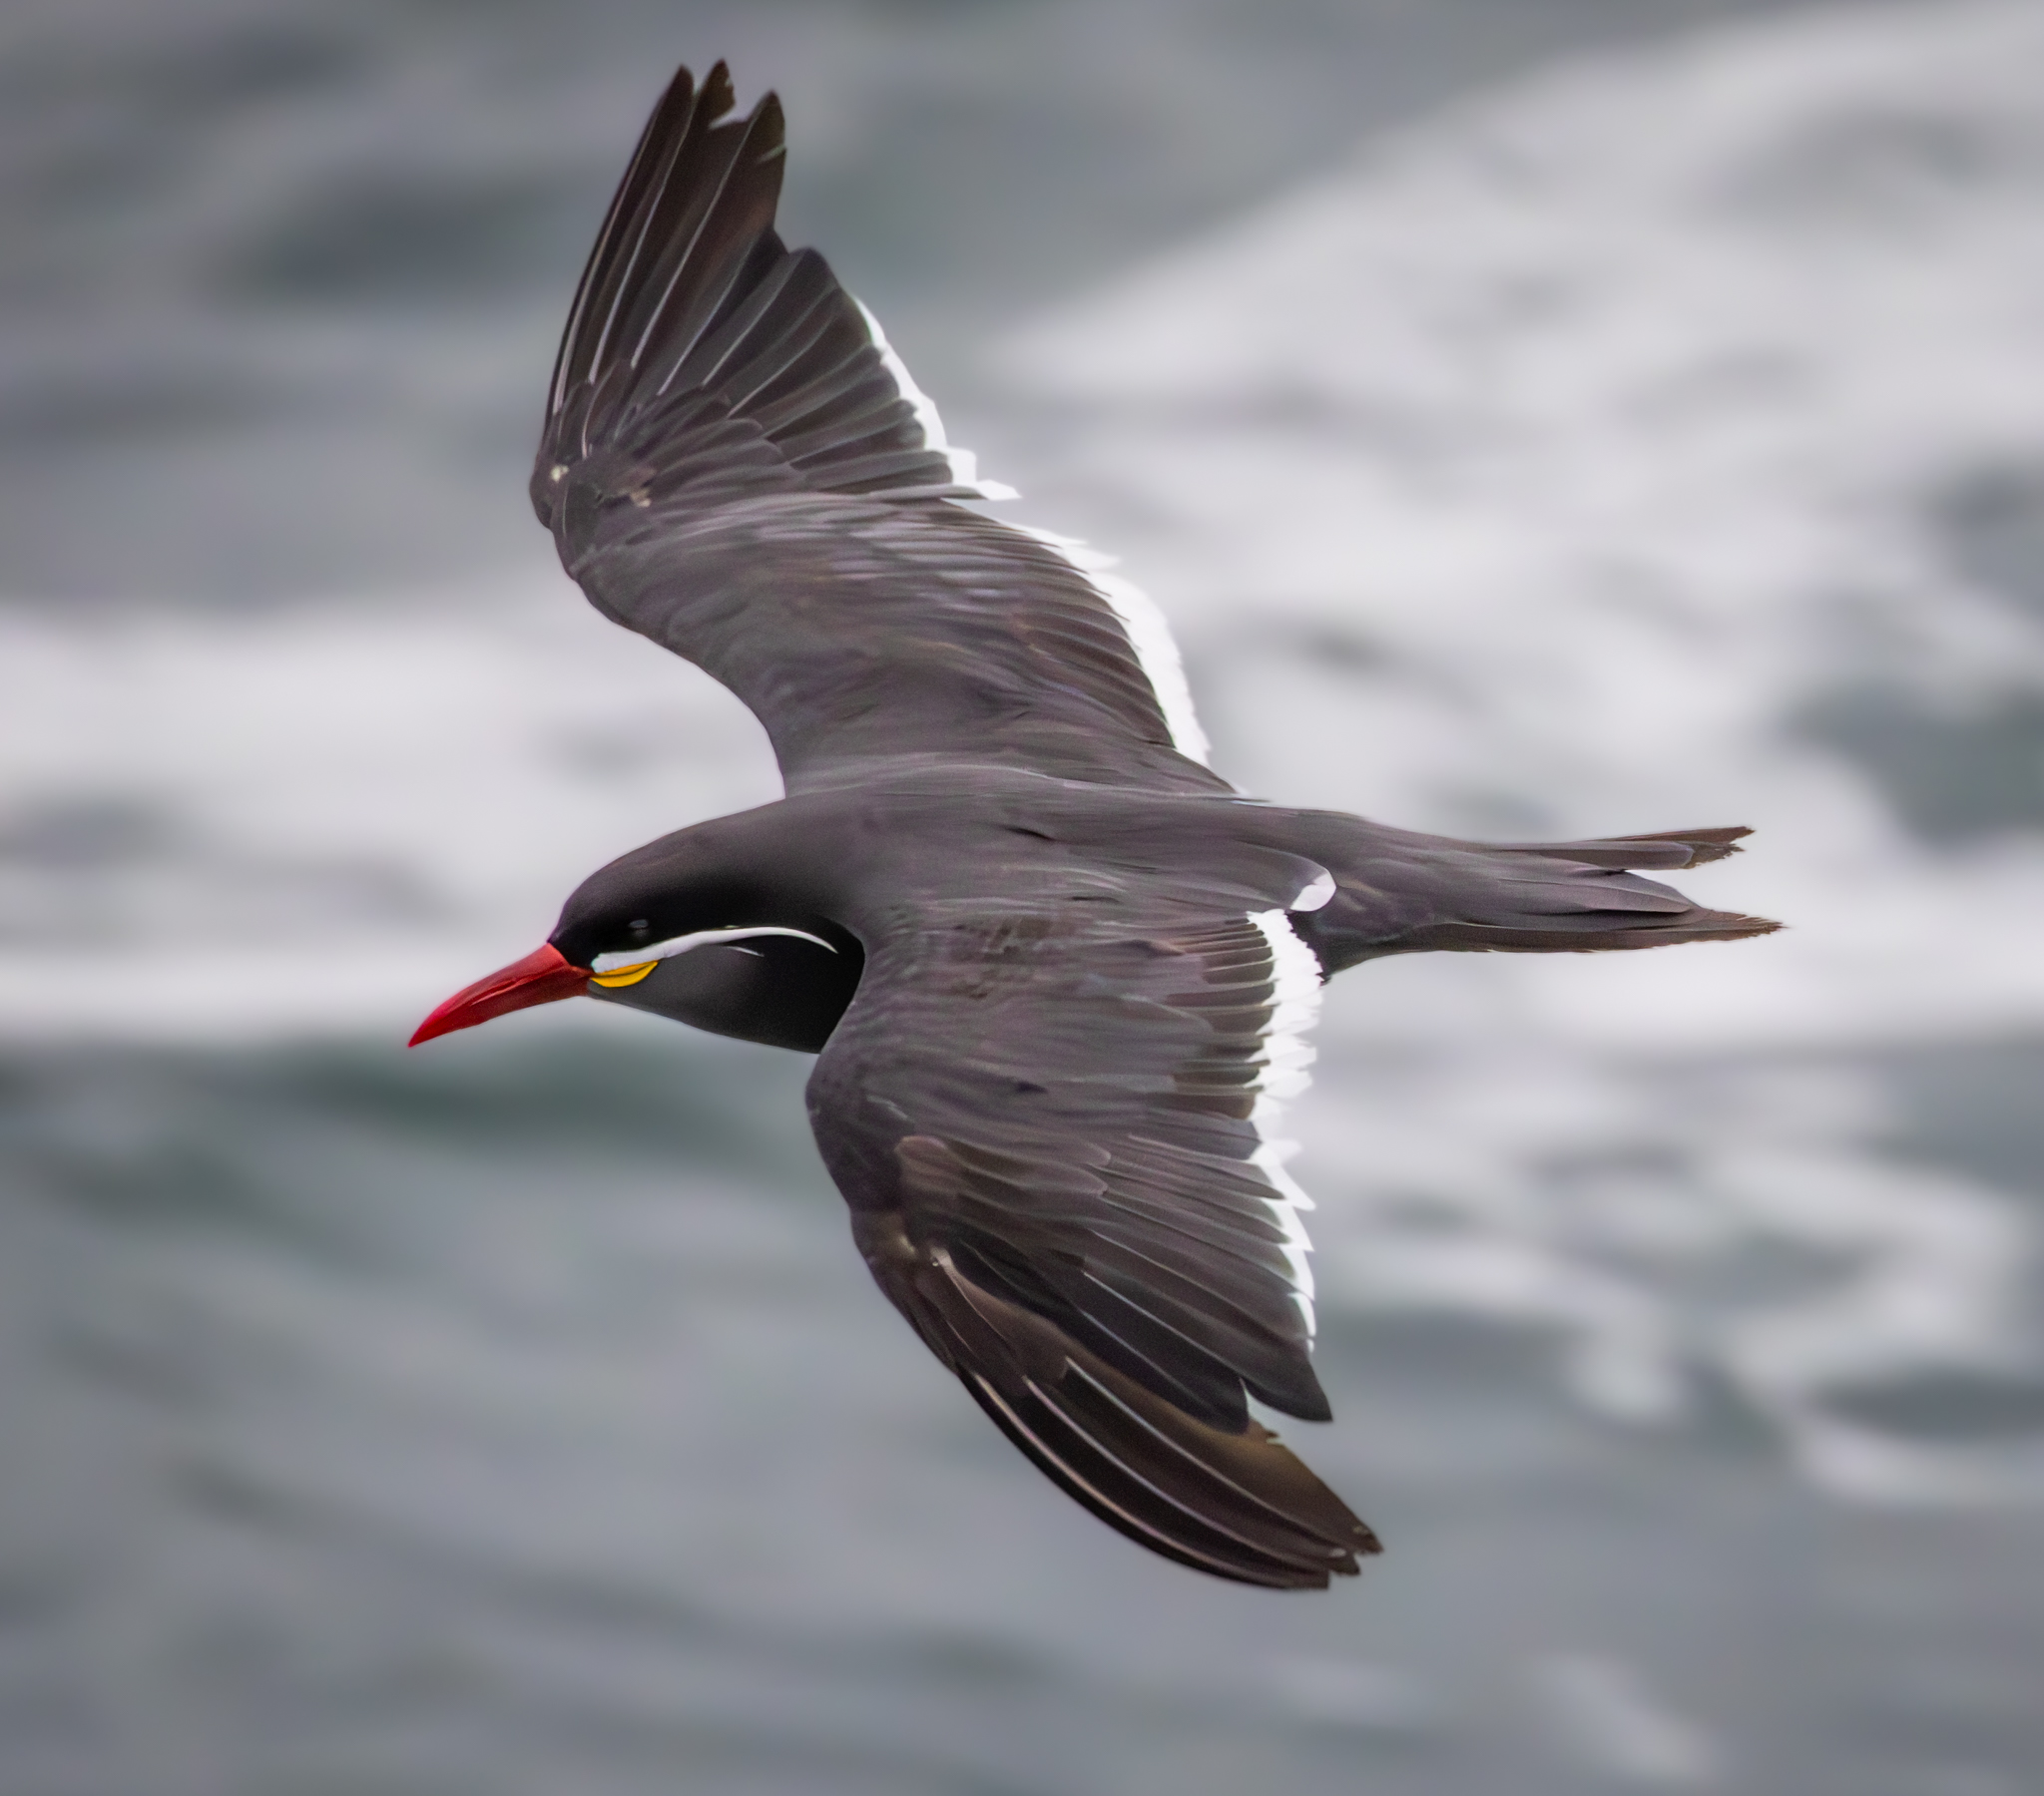
The next image does NOT have the amount of detail recommended by Steve Perry for his Lightroom techniques to work best. However it was one of the better BIF shots I had so I wanted to try it anyway. Again, very noisy and lacks detail (Steve Perry emphasizes that the techniques are designed to make a shot with good detail even better. They won’t “rescue” a poor, out-of-focus, shot).
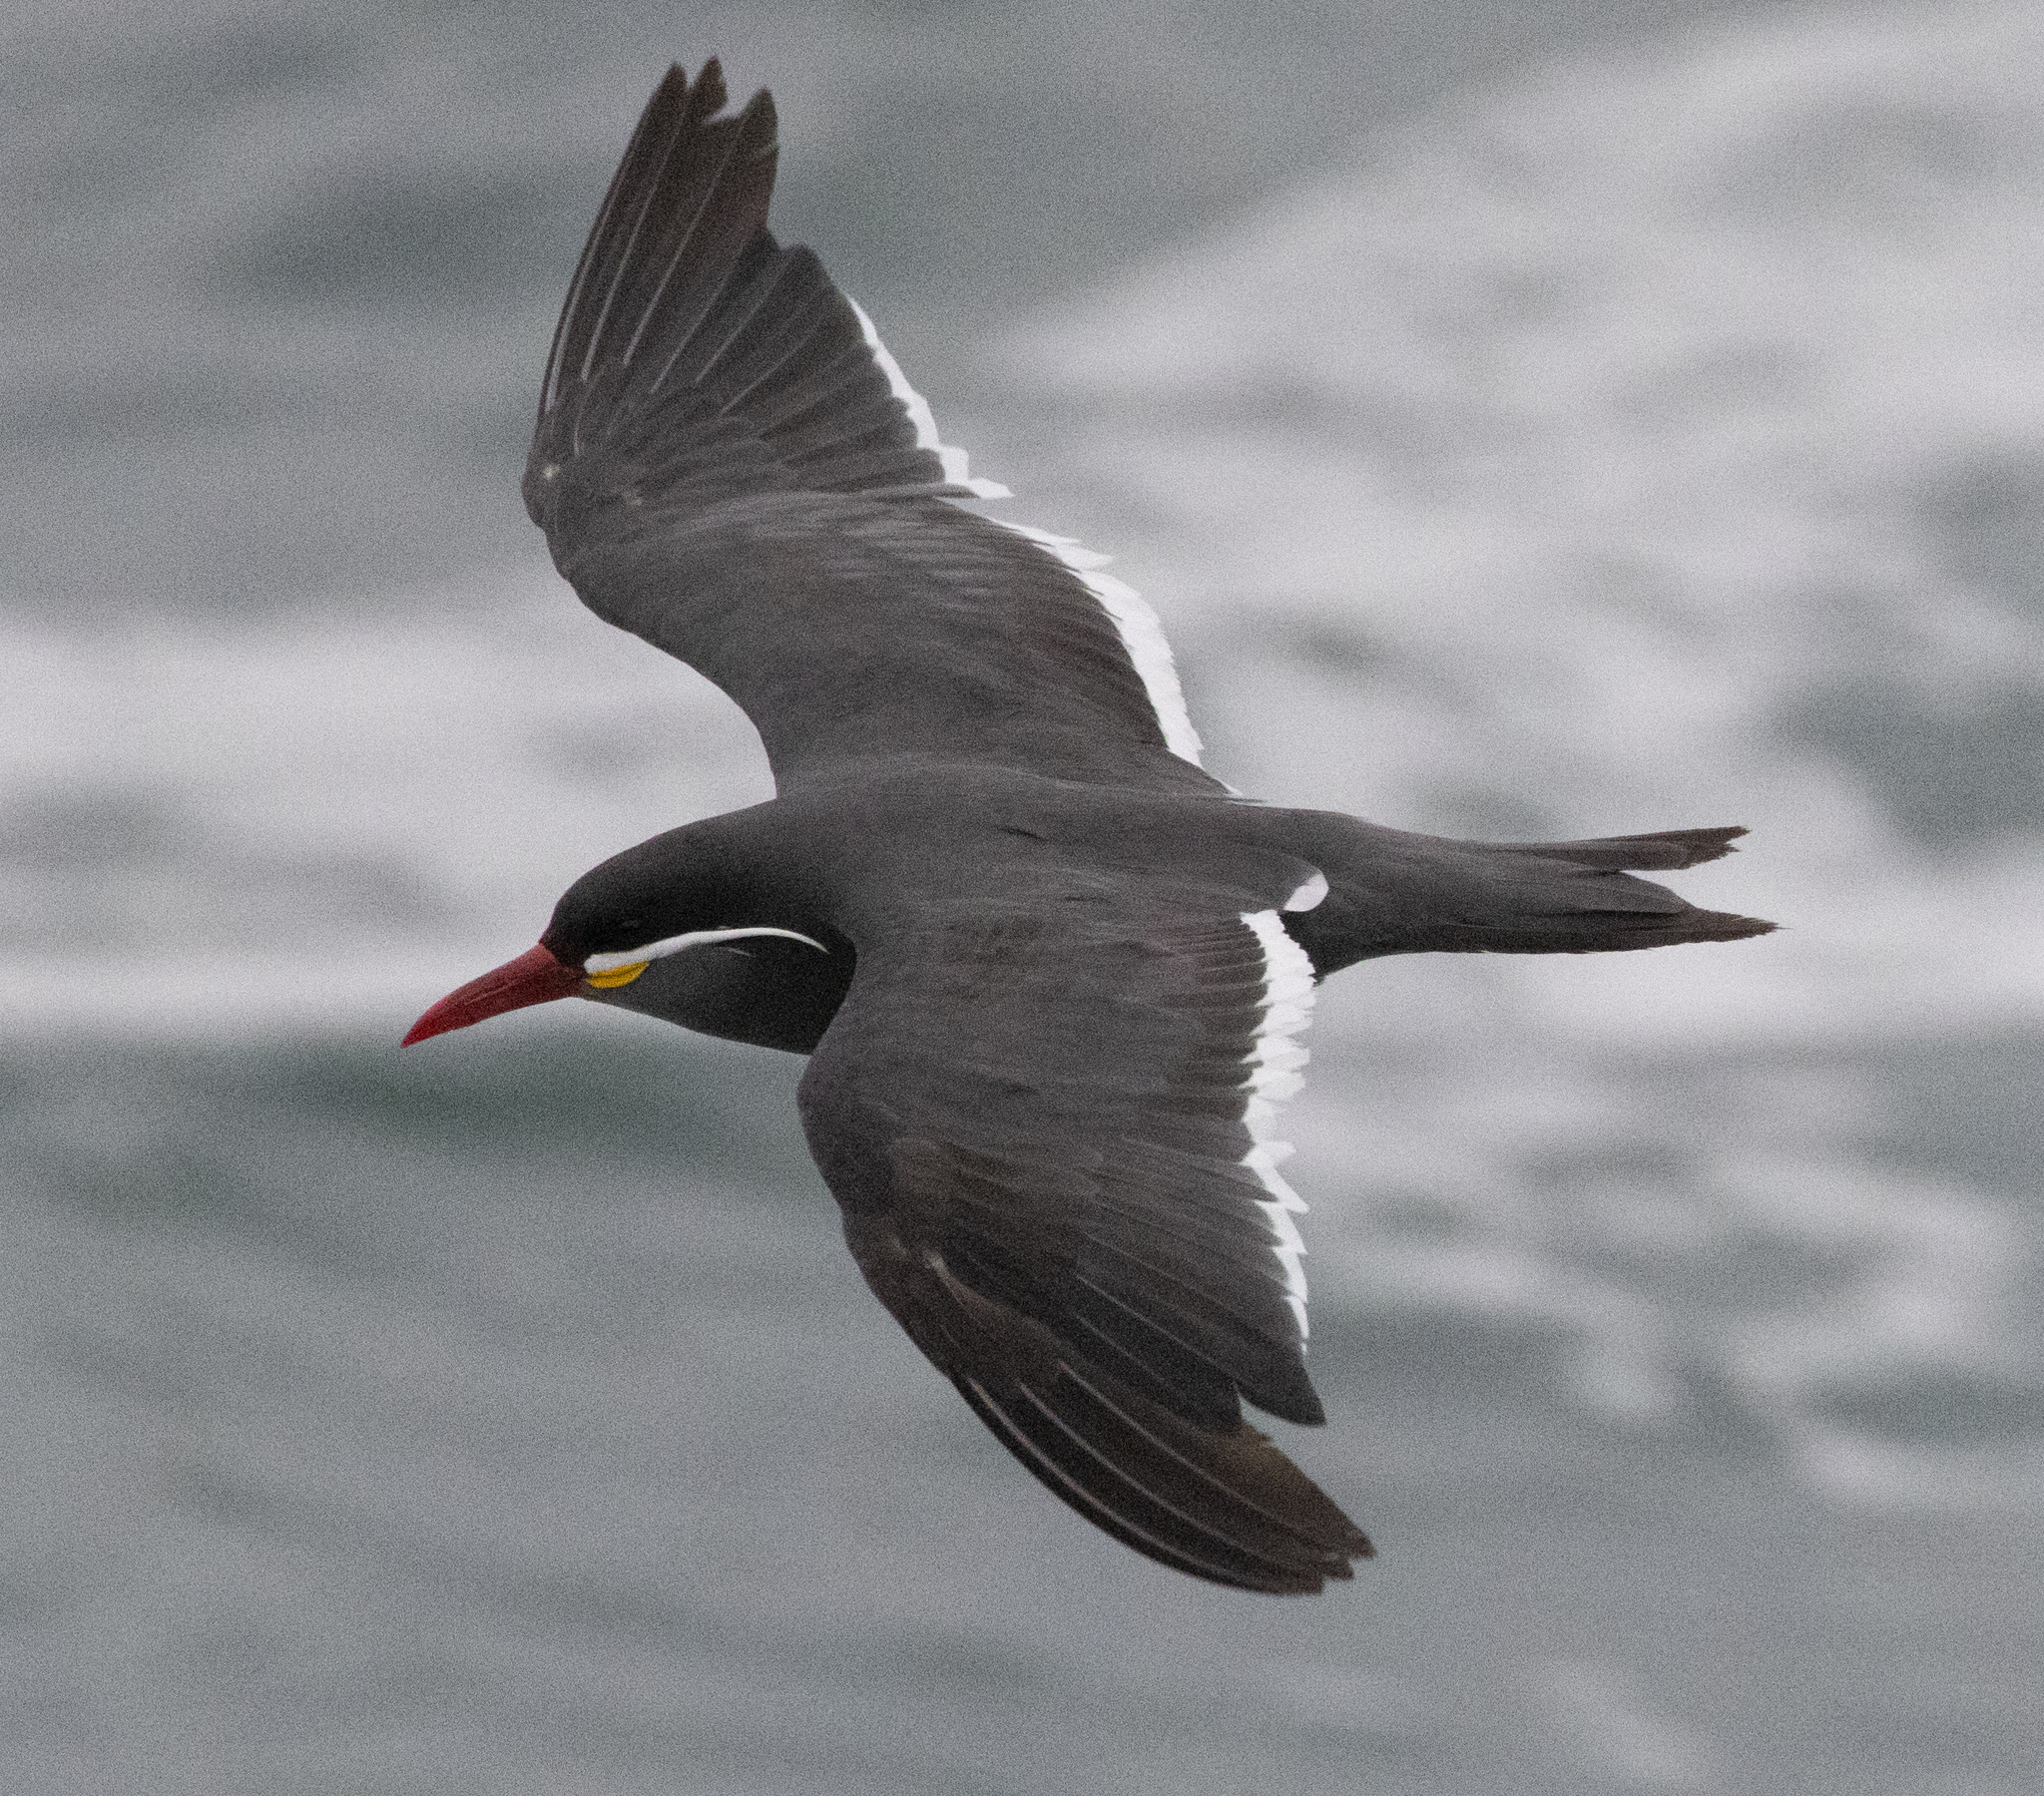
After applying the sharpening/denoise techniques the image is improved. I think some of the wing details look a little artificial, but overall the shot is improved.
Should you apply these techniques to every shot? No – many images don’t need them and it would take too much time (the Denoise function in Lightroom takes 30-50 seconds per image). However if you have some favorite shots you want to make look even better, take a look at the video and apply some of Steve Perry’s techniques.
If you enjoy seeing beautiful pictures of birds from around the world and reading about them Click Here to sign up for our mailing list. Members can post their own GreatBirdPics and learn more about bird photography techniques.