This post is written for anyone who takes bird photographs and uses Lightroom (LR) for post-processing and storage. If you are not into geeky photo/computer stuff then you might want to skip this. For those of you still with me it is best viewed on a larger display (lots of text and small screenshots).
I have over 20,000 bird photographs stored in my Lightroom Catalog. Here’s an overview of how I file them:
By Country (Collection Set for each)
If U.S. then by State (Collection Set for each)
Alphabetically By Species within each of the above two (Collection for each)
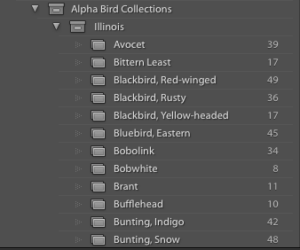
The last one – Alphabetically By Species – is the key. The easiest way for me to do this is to have LR generate a File Name in Last Name, First name format. Once that is accomplished, the rest falls into place. Here’s a look at the end result:
Let’s go back to the beginning and I’ll walk you through the steps I used to get there. After Importing the pictures from a field trip into LR I could have 200 pictures of the birds I saw that day. I might take a few pictures of a Belted Kingfisher first thing, then pictures of several other birds, then another Belted Kingfisher pops up.
After I apply post-processing to all the pictures, I want all the Belted Kingfisher pictures grouped together so I can easily see which are the best ones and delete the bad ones. The only way I have figured how out to group images of the same species together is to change their File Names to “Kingfisher, Belted” and then sort the imported pictures by File Name. Then I am looking at the thumbnail images with “Avocets” grouped together, then “Bluebird, Eastern” grouped together, then “Kingfisher, Belted” grouped together, etc. I can easily go through the images species by species and select the ones I want to keep (rather than hunting through the 200 pics for random Belted Kingfisher pics). There are other advantages of changing the File Name to Last Name, First Name format, which I’ll explain later.
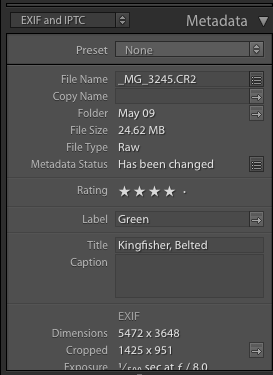
This process begins by typing in the species’ name for each image in Last Name, First Name format in the Title field, which is in the Library Module’s right panel. You can use a comma and dash in the filenames (ie. Blackbird, Red-winged or Duck, Black-bellied Whistling-). As you can see in the example below I have typed in “Kingfisher, Belted” in the Title box.
It’s NOT necessary to type in the same name for the same species over and over again (I’ll often have 20+ pictures of the same bird). Highlight all the images of the same species. Use the method above to enter the species name for one of them in the Title field. Then click the Synch button at the bottom-left of the Right Panel. Up will come the following screen (yours may look different).
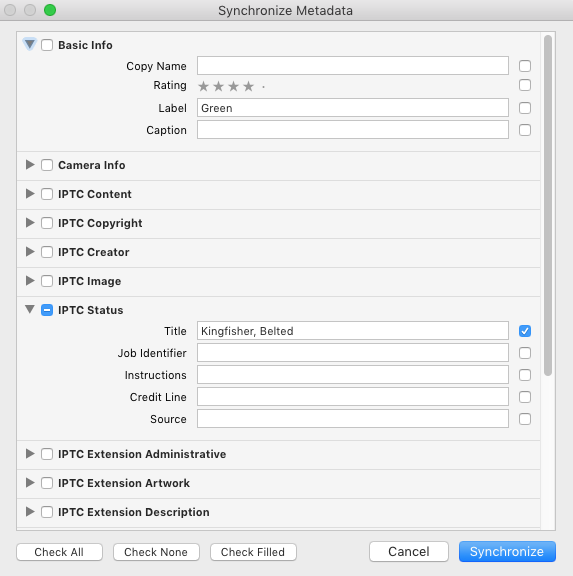
There all sorts of Metadata fields that can be automatically saved to all your selected photos but for our purposes make sure that IPTC Status/Title shows what you have typed in (i.e. Kingfisher, Belted) and the blue checkmark appears to the right (if other blue checkmarks appear that Metadata will be copied as well so make sure only the ones you want to appear in each of your highlighted photos are checked). Click the blue Synchronize button.
After entering the species name for each picture here’s what my Library Grid may look like:
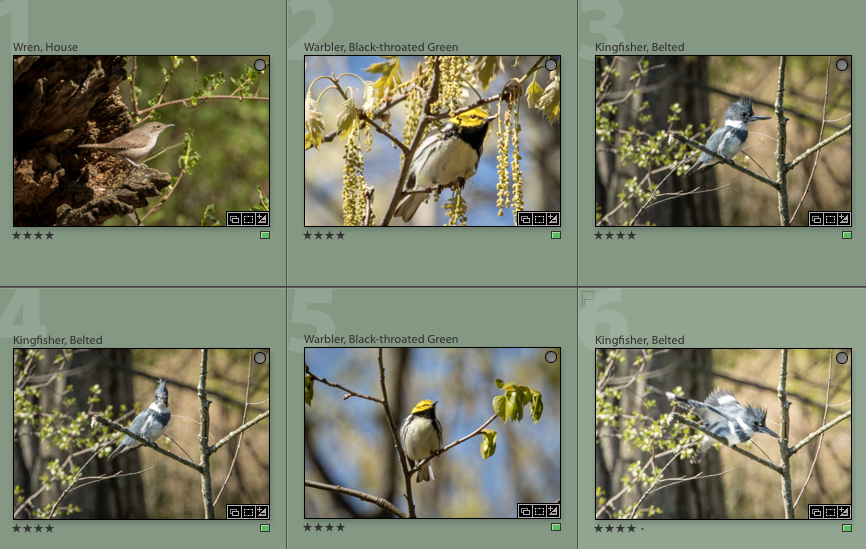
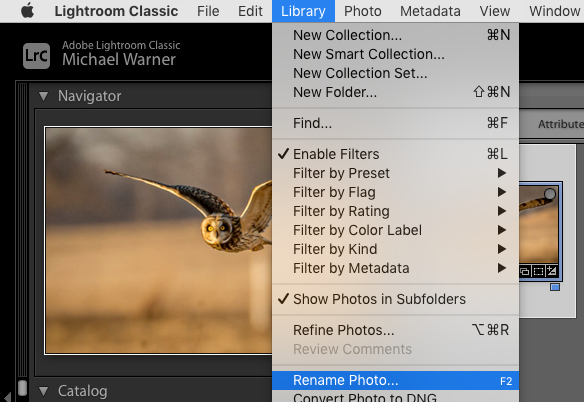
Notice that the images are NOT in alphabetical order yet – they are still in the order in which the shots were taken. We must now tell LR how to use the Title you typed to be the initial part of the File Name. Pull down the Library menu and select “Rename Photo”.
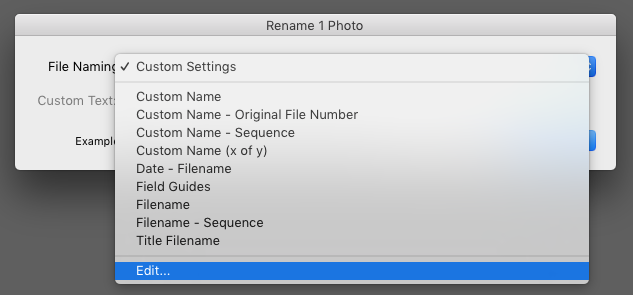
At the right of the “File Naming” box pull down the arrows and select “Edit”
Now we are in the main editing module for Filenames and there are many options. To put the File Name in the format I use, first select under “Metadata”: Title (click Insert). I then type an underscore “_” for separation. Then under “Image Name”: Filename (click Insert). Your screen should look like this:
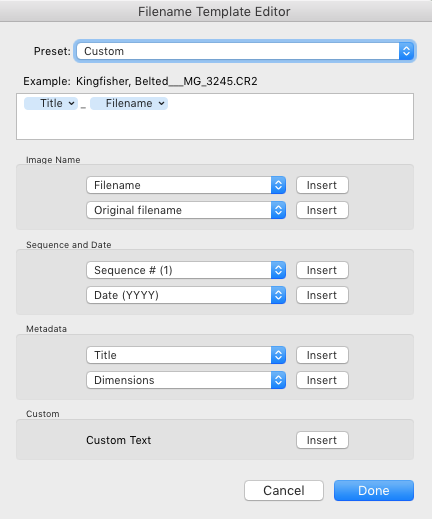
You can see an example of what the final File Name will look like – in this case Kingfisher, Belted_MG_3245.CR2. Click “Done” and you will go back to the “Rename X Photo” screen. Any photos you have highlighted in the Grid will have their File Name changed when you click OK. Be careful at this point because if you rename a photo and then select it again later and rename it the File Name will be something like Kingfisher, Belted_Kingfisher, Belted_MG_3245.CR2.
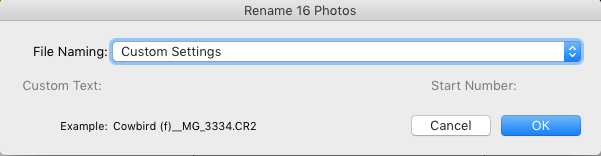
Now select all the photos you want the File Name changed. I usually do this after all the species names have been entered in the set I’m working on. Instead of going through the previous menus you can do it from the Right Panel. There’s a little pulldown menu (three horizontal lines) on the right of the File Name box.
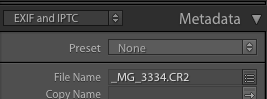
Click the menu and up pops the Rename X Photos box. Check if the example is how you set up the File Name then click OK.
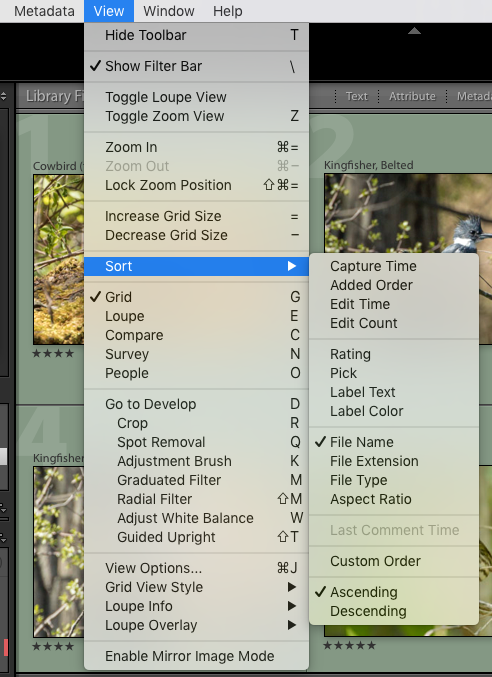
All of the photos you selected will now be renamed using the Last Name, First Name format you entered in the Title box. To sort by File Name (which groups images of the same species together) pull down the “View” menu and select Sort/File Name (note you can’t sort by Title, which would make things so much easier – that’s why you have to go through the whole file renaming process).
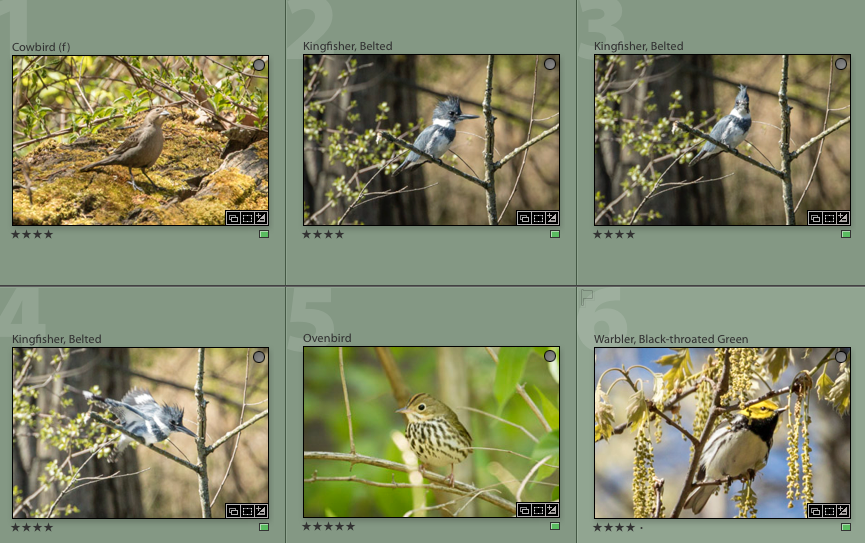
Now when you look at the Library Grid all the images are in alphabetical order.
As a result it’s easy to move these images into a Collection if you name your Collections using the same Last Name, First Name format because it’s all alphabetical. If you have images of a new species to add just select them, type Command-N for New Collection, enter the name of the Collection (I copy/paste the Title as the name of the Collection) and tell it where to store the Collection.
Although this may seem like an awful lot of work, it really isn’t. Once you get in the habit of entering in the names of the species in the correct format all you have to do is select the images and click the little menu next to the File Name box and it will be done! Your Collections will be easy to use and it will take less time to find any old images you want.
Do you have a different way of using Lightroom for your bird photographs? I’d love to hear about it or any feedback about my system.
If you enjoy seeing beautiful pictures of birds from around the world and reading about them Click Here to sign up for our mailing list. Members can post their GreatBirdPics and learn more about bird photography techniques.